
Compare Acrylic Paints
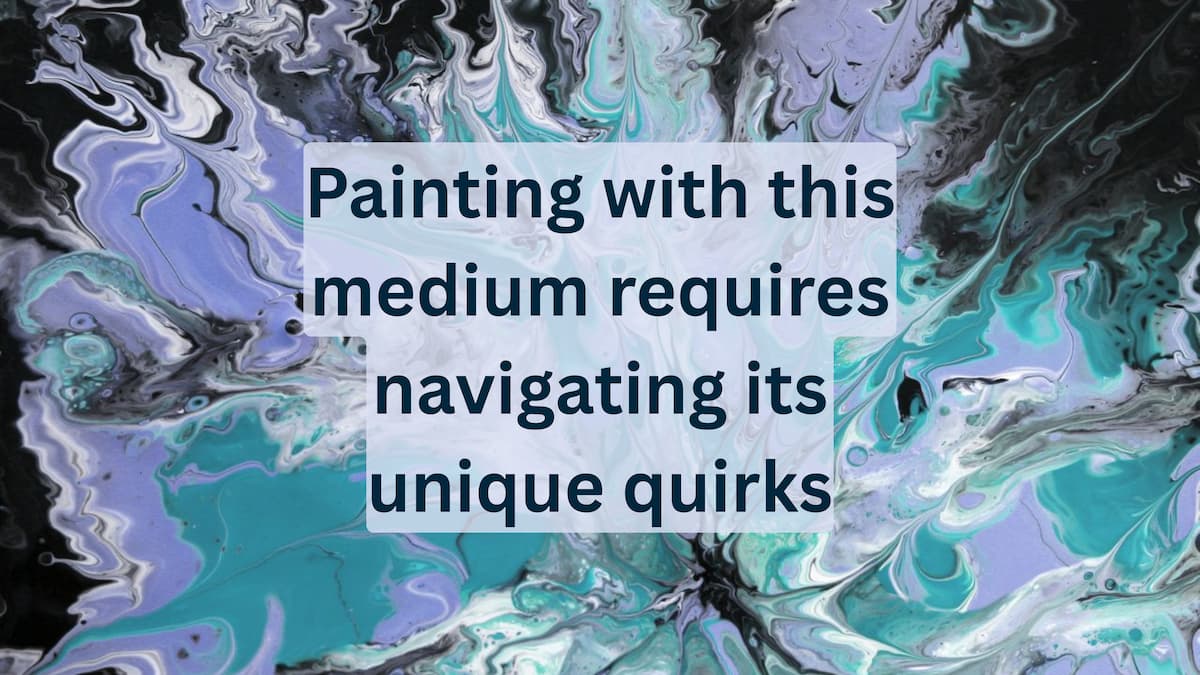
The Reality of Acrylic Paint
Acrylic paint is essentially pigment suspended in a liquid plastic polymer. If you are new to acrylics, you must get used to working with rapid drying times, protecting your brushes from permanent ruin, and anticipating "color shift."
The Good: It dries in minutes, cleans up easily with water, and will stick to almost any surface.
The Bad: It often dries darker than it looks when wet, and it will ruin your brushes instantly if left to dry in the bristles.
The Goal: Learn to work with the fast drying time, rather than fighting against it.
Choosing the right tier of paint early on can dictate how easily you learn the medium. Should you start with budget-friendly student paints to master the medium without financial guilt, or upgrade immediately to professional-grade tubes?
Student Grade (e.g., Liquitex Basics, Golden Open): This is real acrylic paint, but it contains less pure pigment and more fillers. It is highly affordable, making it great for covering large backgrounds without guilt. However, it is less vibrant and can feel "slippery" or plastic-like. (Start here: You will waste a lot of paint just learning to control the drying time).
Professional Grade (e.g., Golden Heavy Body, Liquitex Professional): Pure pigment and resin with no fillers. It offers intense color saturation, and the heavy texture holds your brushstrokes perfectly. However, it is expensive. (Upgrade to these one by one as you empty your student tubes).
Rather than buying overwhelming and expensive 48-color box sets, we recommend mastering your palette early using a split primary system. You only need these seven essential tubes to mix virtually any color you see:
Titanium White (Large Tube): Buy the biggest tube available; you will use it constantly.
Hansa Yellow Medium: A clean, primary yellow.
Naphthol Red Light: A warm, punchy red (like a tomato).
Quinacridone Magenta: A cool, pinkish red (essential for mixing bright purples).
Phthalo Blue (Green Shade): A cool, incredibly powerful blue.
Ultramarine Blue: A warm, deep blue.
Mars Black: A solid, opaque black.
💡 Note on Color Shift: The acrylic binder is milky white when wet but dries completely clear. This means your colors (especially darks) will usually look darker once they dry on the canvas. Try mixing a shade slightly lighter than you think you need.
You should strictly use synthetic (Nylon/Taklon) brushes for acrylics. Try to avoid frequent use of natural hog hair, as the harsh chemicals and frequent washing will destroy them. Never use delicate natural brushes (like Kolinsky sable) with acrylics.
The Water Jar Rule: Most acrylics dry in a matter of seconds. If paint dries inside the metal band (ferrule) of your brush, that brush is dead forever. Keep a jar of water next to you and drop the brush in the water the exact second you stop using it.
Beginners often dilute their acrylic paint with tap water to make it flow better. This is highly risky. Because acrylic needs its plastic binder to stick to the canvas, adding more than 30% water breaks the chemical bond, and your paint may eventually flake off.
Gloss/Matte Medium: Mix this with paint to thin it out or make it transparent (for glazing) without losing structural strength.
Retarder (Slow-Drying Medium): A chemical additive that slows evaporation. It extends your working time from 10 minutes to 30+ minutes, allowing you to blend smoothly like an oil painter.
Canvas Panels: Canvas wrapped around a rigid cardboard or wooden core. They are cheap, rigid, and easy to store. (Best for beginners).
Stretched Canvas: Canvas pulled over a wooden frame. This is the industry standard and offers a nice "bounce" when you press the brush against it.
Paper: Must be very heavy (300gsm / 140lb) or specifically labeled "Acrylic Paper." Standard or thin paper will warp and buckle immediately.
Because acrylic dries so fast, your own palette is your enemy. You can build a DIY "Stay-Wet" palette to solve this:
Take a shallow Tupperware container.
Place a wet sponge or folded, soaked paper towel at the bottom.
Place a sheet of grease-proof baking/parchment paper on top.
Squeeze your paint onto the parchment paper.
The moisture wicks up through the paper, keeping your paint wet and workable for hours (or days, if you snap the lid on).
Walk into the store and grab these items if you want to start painting today:
The Paint (Student Grade): Titanium White (large tube), Hansa Yellow Medium, Naphthol Red Light, Quinacridone Magenta, Ultramarine Blue, Phthalo Blue (Green Shade), and Mars Black.
The Tools: Synthetic brushes (Size 8 filbert, Size 6 bright, Size 2 round).
The Surface: A pack of 9x12" Canvas panels.
The Medium: One bottle of "Gloss Medium & Varnish."
The Palette: A roll of parchment paper and a shallow Tupperware container

Amsterdam Acrylics
Manufactured in the Netherlands by Royal Talens, Amsterdam acrylics have become a global favorite among contemporary painters, muralists, and mixed-media artists. Known for their vibrant palettes, excellent lightfastness, and exceptional versatility, Amsterdam offers solutions for everyone from beginners exploring fluid techniques to professionals demanding structural, heavy-body retention. Whether you are covering massive canvases, pouring, or executing fine impasto details, Amsterdam provides a highly reliable, durable acrylic film that adheres perfectly to almost any porous surface.Choose a specific product line below to view user reviews and details about open time, pigment load, relative cost, lightfastness and viscosity.Specific Product LinesAmsterdam Standard Series Acrylics: The dependable studio and high-volume tier. Formulated with a versatile, medium-body viscosity, this line is incredibly popular for large-scale work, murals, and acrylic pouring. It offers an exceptionally broad color palette—including unique metallics, pearls, and fluorescents—while maintaining a high level of lightfastness. Bound in a 100% acrylic resin emulsion, it delivers a durable, flexible finish at a highly accessible price point.Amsterdam Expert Series Acrylics: The professional, heavy-body tier. Designed for artists who demand structural brushstrokes and maximum color intensity, the Expert Series is formulated with the highest possible pigment concentrations. Unlike the Standard series, this line includes authentic, high-cost pigments (like genuine cadmiums and cobalts) rather than synthetic hues. It offers intense tinting strength, true color mixing, and a thick, buttery consistency that holds knife marks and heavy impasto textures flawlessly.
Options & Tiers:

Apple Barrel Acrylic
Manufactured by Plaid Enterprises, this ubiquitous craft-grade acrylic is formulated specifically for decorative painting on porous surfaces. It features a fluid, self-leveling consistency designed to minimize brushstrokes and provide uniform coverage. The formulation prioritizes immediate opacity via high filler content rather than pure pigment load, drying to a distinctive, velvety dead-matte finish.Technical Specifications & UsageGrade Classification: Craft/Decorative grade; formulated for economy and coverage rather than archival permanence or lightfastness.Rheology: Low viscosity / Fluid; pours easily and levels out quickly, making it unsuitable for impasto or texturing techniques.Surface Sheen: Dries to a completely flat, non-reflective matte finish, which hides surface imperfections on craft projects.Pigment Strategy: Relies heavily on opacifiers, fillers (like calcium carbonate), and pre-mixed "hue" pigments to achieve coverage and specific color matches.Adhesion: Optimized for porous substrates such as wood, Styrofoam, terra cotta, and plaster; adhesion to non-porous surfaces (plastic, glass) is poor without primers.Opacity: High opacity; designed to cover background colors in 1–2 coats, making it ideal for base-coating and stenciling.Tinting Strength: Low; due to the high volume of white fillers, mixing this with other paints will significantly desaturate and "chalk out" the mixture.Durability: While permanent, the dried film is less durable and water-resistant than artist-grade acrylics; it is intended strictly for indoor use.Safety: Certified AP non-toxic and water-based; widely used in educational settings due to its safety profile.Drying Time: Extremely fast drying (5–15 minutes) due to the porous nature of the binder and fillers.Intermixability: Technically compatible with artist acrylics, but adding Apple Barrel to professional paints will drastically lower the sheen and archival quality of the mix.Clean-up: cleans up easily with soap and water; unlike professional acrylics, dried paint can often be removed from brushes with warm soapy water.Criteria RatingsRelative Cost: 1.0Lowest. It is arguably the cheapest paint per ounce available at retail.Viscosity: 3.5Fluid. It is runny and self-levels quickly. It offers zero resistance to the brush.Drying Speed: 1.5Very Fast. Because the layer is thin and water-based, it dries to the touch in minutes.Average Lightfastness: 2.0Fugitive. These paints are formulated with dyes and cheap pigments. They are not tested for archival longevity.Pigment Load: 2.0Minimum. It relies heavily on opacifiers (white chalky filler) rather than pure pigment. Colors can look "washed out" when mixed.

Ara Artists’ Acrylic
While many artists are familiar with the massive American or French paint houses, the Dutch-made Ara Artists’ Acrylics represent a best-kept secret among European professionals. Developed originally at the Gerrit Rietveld Academy in Amsterdam, Ara was created because artists wanted a paint that possessed the pigment quality of a premium brand like Old Holland but with the versatility and price point required for large-scale contemporary works.Today, Ara is produced by Old Holland, meaning it benefits from centuries of pigment expertise while utilizing a modern, 100% pure acrylic emulsion binder.The Binder: 100% Pure Acrylic ResinUnlike student-grade paints that use fillers to bulk out the jar, Ara uses a 100% acrylic resin binder. This results in a paint film that is incredibly flexible and durable. Once dry, the paint is water-resistant and can withstand the internal movements of large canvases without cracking. This pure binder also ensures that the colors remain brilliant and don't take on a chalky appearance once the water evaporates.The Consistency: The "Creamy" Mid-ViscosityAra does not follow the traditional "Heavy Body" or "Fluid" labels. It sits in a unique middle ground often described as smooth or creamy. It is soft enough to be brushed out into flat, even fields of color but has enough body to hold soft peaks and texture if applied with a palette knife. This makes it an incredibly versatile workhorse paint for everything from detailed illustration to massive mural projects.The Old Holland PedigreeBecause Ara is manufactured by the same team behind Old Holland (widely considered one of the world's premium oil paints), the pigment selection is elite. The range includes highly specialized colors, including a massive array of neons, metallics and iridescents that maintain a level of intensity rarely seen in other acrylic lines.If you need the archival reliability and the pigment punch of a premium brand, but you work on large-scale pieces that make the cost of other professional paints prohibitive, Ara is your solution. It offers a sophisticated, creamy feel that makes it a joy to use for both fine detail and expansive color-field painting.

Arteza Acrylics
If you have searched for acrylic paint on Amazon in the last five years, you have seen Arteza. This brand disrupted the market by bypassing art stores and selling directly to consumers online. Their strategy is simple: "volume and variety."Arteza is best known for selling massive sets (24, 60, or even 120 colors) at a price per tube that makes traditional brands look expensive. It is positioned as a "premium student" paint—superior to Apple Barrel craft paint but not reaching the archival reliability of Golden or Liquitex Professional. It is the top choice for hobbyists, bullet journalers, and beginners who want to own every color of the rainbow without mixing them.CONFUSION ALERT: Premium vs. ExpertArteza sells two distinct grades that look almost identical online.Premium (Most Common): Sold in sets of 60ml tubes or large pouches. Soft body. Good for detail and smooth coverage.Expert: Sold in 75ml or 120ml tubes/pouches. Heavy body. Higher pigment load and thicker consistency.The Rule: If you are buying a box of 60 colors, it is almost certainly the "Premium" line. If you want texture, look specifically for "Expert."The Pouch RevolutionArteza (following Holbein's lead) popularized the squeezable pouch for their larger volumes.The Design: A flexible plastic pouch with a screw cap.The Benefit: It is incredibly durable and allows you to squeeze out every drop of paint without rolling up a metal tube. It is lighter to ship and store.The "Pouring" Angle: Because of the pouch and softer viscosity, Arteza became a favorite for acrylic pouring artists who needed large volumes of paint to mix with pouring medium.Working PropertiesViscosityThe Feel: Soft body (Premium). It has the consistency of lotion or soft toothpaste. It is not water-like, but it will not hold a crisp peak. It brushes out very smoothly, making it excellent for flat illustrations.SheenThe Finish: Glossy. Unlike many student paints that dry chalky/matte, Arteza tends to dry with a distinct plastic gloss. This makes the colors look vibrant, but it can feel a bit "sticky" or tacky even after it is dry to the touch.The ArtHero VerdictThe gift giver or hobbyist:Buy the 60-color set.Why: It is the ultimate "unboxing" experience. Having 60 distinct colors (including neons and metallics) encourages play and experimentation.The professional selling work:Proceed with caution.Why: While Arteza claims ASTM lightfastness, independent tests have shown that some of their reds and pinks fade faster than professional standards. If you are selling art for hundreds of dollars, stick to a brand with a longer proven track record.

Blick Acrylics
Blick Art Materials offers three distinct lines of acrylic paints, engineered to provide artists and educators with reliable, high-performance colors for every stage of their creative journey. From the classroom where volume and safety are paramount, to the professional studio where archival quality is required, Blick delivers vibrant, durable, and highly flexible acrylic films across all price points without the premium markup of imported brands.Choose a specific product line below to view user reviews and details about open time, pigment load, relative cost, lightfastness and viscosity.Specific Product LinesBlick Artists' Acrylics: The professional, heavy-body tier. Manufactured in small batches in the USA, this line features exceptionally high pigment concentrations and is formulated without fillers or extenders. It delivers intense tinting strength, brilliant lightfastness, and a thick, buttery consistency that holds crisp brushstrokes and palette knife marks beautifully. Bound in a premium 100% acrylic polymer emulsion, it dries to a permanent, non-yellowing finish, making it ideal for working professionals who demand archival quality.Blick Studio Acrylics: The premium student and high-volume tier. Designed specifically for underpainting, large-scale canvases, and artists needing reliable color coverage on a budget. By substituting expensive, toxic pigments with highly stable synthetic alternatives (hues), Blick maintains a vivid color palette and a smooth, buttery texture that mimics professional heavy-body paint while remaining highly affordable.Blickcrylic Student Acrylics: The true classroom and economy tier. Specifically formulated for educators, beginners, and high-volume craft projects, this everyday acrylic offers a fluid-to-medium consistency that is easy to mix and pump directly from half-gallon jugs. It is non-toxic, fast-drying, and provides excellent coverage for learning color theory, murals, and daily academic use at an unbeatable value.
Options & Tiers:

Chroma Acrylics
Founded in Australia, Chroma has built a global reputation for pushing the boundaries of what acrylic paint can do. Best known for their groundbreaking interactive formulas that allow artists to blend and rework acrylics much like oils, Chroma also produces world-class student paints and highly specialized matte flow acrylics. Whether you are seeking prolonged open times for smooth gradients, reliable heavy-body colors for the classroom, or a velvety, reflection-free finish for illustration and decorative arts, Chroma offers unique, high-performance solutions that challenge traditional acrylic limitations.Choose a specific product line below to view user reviews and details about open time, pigment load, relative cost, lightfastness and viscosity.Specific Product LinesAtelier Interactive Professional Acrylics: The revolutionary, professional-grade tier. Unlike traditional acrylics, Atelier Interactive features a unique, patented formulation that allows the paint to be reactivated with water or a special Unlocking Formula even after it feels touch-dry. This gives artists the unprecedented ability to extend their open time indefinitely for soft, oil-like blending, while still offering the option to dry rapidly when desired. It boasts a thick, buttery consistency, maximum pigment load, and minimal color shift from wet to dry.Atelier A2 Art Students' Acrylics: The premium student and high-volume tier. Designed to be fully compatible with Atelier Interactive, the A2 line offers exceptional heavy-body texture and vibrant colors at a highly accessible price point. While it dries at the rapid rate of a traditional (non-interactive) acrylic, it utilizes lightfast pigments and excellent, stable hues to ensure students and budget-conscious artists achieve brilliant color mixing and structural impasto effects without the professional price tag.Jo Sonja's Matte Flow Acrylics: The professional, velvety-matte tier. Originally formulated for decorative and folk artists, these highly pigmented, fluid acrylics have become a massive favorite among fine artists, illustrators, and designers. They offer a smooth, flowable consistency that levels beautifully to eliminate brushstrokes. Bound in a specialized 100% acrylic emulsion, Jo Sonja paints dry to an incredibly durable, completely reflection-free matte finish, making them perfect for gouache-like techniques, detailed illustration, and artwork intended for photography or digital reproduction.
Options & Tiers:

Daler-Rowney Acrylics
Manufactured in England, Daler Rowney has engineered one of the most widely used and trusted acrylic ranges in the world: the System 3 family. Designed to offer an exceptional balance of performance and affordability, System 3 acrylics cater to art students, muralists, and professionals requiring vast quantities of reliable, vibrant color. Whether you need a versatile medium-body paint for traditional canvas work and screen printing, or a highly flowable consistency for pouring and fine details, Daler Rowney provides a highly durable, lightfast acrylic film that adheres permanently to almost any surface.Choose a specific product line below to view user reviews and details about open time, pigment load, relative cost, lightfastness and viscosity.Specific Product LinesSystem 3 Original Acrylics: The dependable, medium-body studio tier. System 3 Original is a versatile water-based acrylic offering excellent lightfastness, permanence, and covering power at a highly accessible price point. Its medium-body consistency is thick enough to retain subtle brush marks, yet smooth enough to be easily thinned for watercolor-style washes or mixed with screen printing mediums. It is the ultimate workhorse for large-scale paintings, educational environments, and everyday mixed-media applications.System 3 Fluid Acrylics: The highly flowable, pigment-rich fluid tier. System 3 Fluid delivers the exact same brilliant colors and lightfastness as the Original line, but in a smooth, self-leveling consistency. It requires no additional thinning to achieve flawless, brushstroke-free coverage. This makes it perfect for pouring techniques, dripping, detailed illustration work, and fluid applications where an intense pigment load and a liquid viscosity are essential.
Options & Tiers:

Golden Acrylics
Founded in 1980 in rural New York by Sam Golden, Golden Artist Colors is widely considered the gold standard of modern acrylic paint. Dedicated entirely to the professional artist, Golden does not produce a student-grade line; instead, they focus on pushing the boundaries of what pure acrylic polymer can do. Known for refusing to use fillers, extenders, or artificial matting agents in their core lines, Golden offers an unparalleled spectrum of viscosities and open times. Whether you need thick, structural impasto, ink-like drips, prolonged blending times, or a velvety matte finish, Golden has engineered a specific, master-quality paint for your technique.Choose a specific product line below to view user reviews and details about open time, pigment load, relative cost, lightfastness and viscosity.Specific Product Lines Golden Heavy Body Acrylics: The original, professional impasto tier. Known for an exceptionally smooth, thick, and buttery consistency, this line contains the largest assortment of unique pure pigments in a 100% acrylic emulsion. Because Golden does not add matting agents, each color dries to its own natural finish (from glossy to matte depending on the pigment). It retains crisp brush strokes and palette knife marks perfectly.Golden Fluid Acrylics: The professional, self-leveling tier. Fluids offer the exact same intense pigment load as Heavy Body acrylics, but are formulated to the viscosity of heavy cream. They flow evenly from the brush, dry with excellent film integrity, and are ideal for staining, smooth blending, and detailed brushwork without requiring additional thinning mediums.Golden High Flow Acrylics: The ink-like, ultra-fluid tier. High Flow delivers massive, professional-level pigment concentration in a liquid consistency that flows effortlessly. It is designed to be used directly from the bottle for airbrushing, refilling paint markers, calligraphy pens, pouring techniques, and highly detailed fine art illustration.Golden OPEN Acrylics: The slow-drying, oil-like tier. OPEN acrylics feature a uniquely relaxed resin formulation that allows the paint to stay wet and workable for hours rather than minutes. This grants acrylic painters the unprecedented ability to soften edges, blend portraits, and utilize subtractive techniques just like oil painters, making them ideal for plein air painting, monoprinting, and glazing.Golden SoFlat Matte Acrylics: The glare-free, maximum opacity tier. Formulated specifically to overcome the natural glossy, plastic-like tendencies of acrylic, SoFlat levels beautifully to eliminate brushstrokes and dries to an intense, velvety matte finish. It offers exceptional hiding power (opacity) in a fluid consistency, making it the absolute perfect choice for pop art, large-scale color blocking, illustration, and artwork intended for digital photography.
Options & Tiers:

Grumbacher Academy Acrylics
If you took an Art 101 class in an American high school or college in the last 30 years, you likely used Grumbacher Academy. This paint is positioned as "Collegiate Grade"—a marketing term intended to suggest it sits slightly above "Student" (like Liquitex Basics) but below "Professional."It is the Toyota Camry of acrylics: utterly reliable, widely available, and unpretentious. While it lacks the extreme pigment load of Golden or the unique binder technology of Schmincke, it offers a consistent, predictable experience that makes it perfect for learning color theory and mixing.The "Thalo" LegacyGrumbacher is famous for one specific pigment family: Thalo (their trademarked spelling for Phthalocyanine).The Strength: Even in this student line, the Thalo Blue and Thalo Green are notoriously powerful. They will overpower any mix if you aren't careful.The Lesson: This makes Academy excellent for teaching students about tinting strength—one tiny dot of Thalo Blue can turn a whole cup of white paint blue.The "Genuine" ConfusionThe Labeling: Unlike some student brands that clearly scream "HUE" in giant letters, Grumbacher labeling can be subtle.The Reality: Most of the expensive colors in this line (cadmiums, cobalts) are hues (synthetic mixtures). While they mimic the color of Cadmium Red, they do not have the density or opacity of the metal. They are semi-transparent, which can frustrate students trying to paint solid red over a dark background.Working PropertiesConsistencyThe Feel: Smooth and creamy. It is slightly softer than Golden Heavy Body but stiffer than a fluid acrylic. It is designed to be brushed out easily without needing to add water or medium, which helps beginners avoid under-binding their paint.Color ShiftThe Shift: Noticeable. Like most student-grade acrylics, the binder is milky wet and clear dry. You will experience a significant value shift (darkening) as the paint dries, which can make precise color matching difficult.The ArtHero VerdictThe "classroom" learner:Buy the set.Why: The color selection is tuned for education. The tubes are durable, and the paint behaves predictably. It is the safest entry point for a beginner.The impasto painter:Avoid.Why: The paint has a high water content relative to professional brands. If you pile it up an inch thick, it will shrink significantly as it dries, leaving your peaks looking deflated.

Holbein Acrylics
Headquartered in Osaka, Japan, Holbein brings its world-renowned micro-milling technology and exceptional color purity to the realm of acrylics. Known for producing some of the most uniquely vibrant and highly pigmented paints in the industry, Holbein caters to illustrators, designers, and fine artists who demand flawless handling and striking visual impact. Whether you are looking for the absolute opaque, velvety-matte finish of an acrylic gouache, or the thick, structural retention of a professional heavy body paint, Holbein's acrylic ranges deliver unsurpassed brilliance and reliability.Choose a specific product line below to view user reviews and details about open time, pigment load, relative cost, lightfastness and viscosity.Specific Product LinesHolbein Acryla Gouache: The industry standard for opaque, matte acrylics. Beloved by illustrators, designers, and fine artists alike, Acryla Gouache handles with the creamy opacity of a traditional gouache but is bound in a durable water-soluble acrylic resin. This means it dries quickly to a water-resistant, ultra-matte, and perfectly flat finish. Crucially, it does not shift in color tone from wet to dry, allowing artists to mix and match perfectly predictable hues while layering without reactivating the paint underneath.Holbein Heavy Body Artist Acrylics: The professional, high-viscosity tier. Utilizing Holbein's signature micro-milling process, these heavy body acrylics offer a uniquely smooth, buttery consistency that still retains crisp brush strokes and sharp palette knife peaks. They boast an incredibly high pigment load, brilliant lightfastness, and a distinctly vivid color palette that includes unique traditional Japanese hues. Bound in a premium acrylic emulsion, they provide a durable, flexible, and brilliant finish for professional fine art applications.
Options & Tiers:

Lascaux Acrylics
Founded in Switzerland in 1963 by Alois K. Diethelm, Lascaux is responsible for developing the very first artist-quality acrylic paint on the European continent. Inspired by the prehistoric artistry of the Lascaux caves, the company operates under the philosophy of "The Spirit of Colours," merging modern synthetic resin technology with the purest pigments available. Renowned for their incredible color depth, archival permanence, and Swiss-engineered consistency, Lascaux paints are a top choice for professional artists, muralists, and world-class art restorers. Whether you require a thick, oil-like paste for structural impasto or a smooth, versatile studio workhorse, Lascaux provides a professional system that is exceptionally lightfast, non-yellowing, and resistant to aging.Choose a specific product line below to view user reviews and details about open time, pigment load, relative cost, lightfastness and viscosity.Specific Product LinesLascaux Artists' Acrylics: The premier professional, high-viscosity tier. Often described as having the "soul of an oil paint," this line features a concentrated pigment load and a thick, buttery consistency that holds peaks and knife marks flawlessly. Formulated without fillers or extenders, these colors dry to a uniform, semi-matte finish with minimal shrinkage. They are incredibly luminous and durable, making them suitable for everything from delicate fine art glazes to large-scale outdoor sculptures and murals.Lascaux Studio Original Acrylics: The professional, versatile studio tier. While often categorized as a "studio" paint, in the European tradition, this represents a high-performance professional workhorse designed for large-scale application. It features a smooth, viscous consistency that is slightly more fluid than the Artists' line, offering excellent coverage and "fine brushability" straight from the bottle. It is highly yielding and economical for artists covering large surfaces, drying to a tough, flexible, and weather-resistant film that is ideal for both interior design and exterior mural projects.
Options & Tiers:

Lefranc & Bourgeois
For decades, standard acrylic paint has dominated the studio. However, many beginners and professionals run into the same frustrating limitations with traditional acrylic polymers: a glossy, plastic-like glare under studio lights, an annoying color shift where the paint dries darker than when it was wet, and poor adhesion on unconventional surfaces.The solution to these issues is not a better acrylic, but a completely different chemical formulation entirely. Enter Lefranc & Bourgeois (L&B) Flashe.Invented in France in 1954 originally for theater set designers, Flashe is a legendary alternative to standard acrylics. Because its core formulations behave completely differently than standard acrylic polymers, it absorbs light entirely rather than reflecting it. This results in an ultra-matte, velvety, flat finish that looks identical from every viewing angle, making it highly prized by illustrators, designers, and fine artists whose work needs to be scanned or photographed without glare.The Flashe ecosystem is currently divided into two distinct formulations, each serving a specific studio need:Flashe Vinyl Emulsion: The original 1954 formula utilizing a vinyl resin emulsion. It is famous for its intense opacity, heavy coverage, and ability to adhere to almost any raw surface without primer.Flashe Biobased: The modern evolution of the classic line. It utilizes a naturally sourced alkyd binder to drastically reduce petroleum use and microplastics, while perfectly mimicking the ultra-matte finish and opacity of the original vinyl.
Options & Tiers:

Liquitex Acrylics
In 1955, Liquitex literally changed the art world by inventing the first commercially available water-based artist acrylic. Deriving its name from "Liquid Texture," Liquitex has spent decades pioneering new formulations, mediums, and tools for the modern acrylic painter. Known for their incredibly durable, flexible, and non-yellowing polymer resin, Liquitex offers a fully intermixable ecosystem of paints. Whether you are a professional demanding crisp, heavy impasto, a fine-detail illustrator needing smooth self-leveling color, or a student covering massive canvases on a budget, Liquitex provides an expertly engineered viscosity to match your workflow.Choose a specific product line below to view user reviews and details about open time, pigment load, relative cost, lightfastness and viscosity.Specific Product LinesLiquitex Heavy Body Acrylics: The professional, high-viscosity tier. Formulated for traditional art techniques using brushes or knives, this exceptionally thick, buttery paint retains crisp brushstrokes and heavy impasto peaks perfectly. It features a high concentration of artist-quality, lightfast pigments in a low-odor acrylic resin base that dries to a flexible, permanent, and UV-resistant finish.Liquitex Soft Body Acrylics: The professional, self-leveling tier. This is the original Liquitex formulation from 1955. Soft Body delivers the exact same intense professional pigment load as Heavy Body, but in a remarkably smooth, fluid consistency. It flows evenly from the brush, eliminating brushstrokes and making it the ultimate choice for large-area coverage, fine detail work, and mixed media applications without the need for additional thinning mediums.Liquitex Basics Acrylics: The premium student and everyday tier. Designed for high-volume use, beginners, and large-scale murals, Basics provides an excellent balance of quality and affordability. It features a medium-viscosity, heavy-body-like texture that retains brush marks while remaining easy to blend. By utilizing highly stable synthetic pigment alternatives (hues), Liquitex ensures vibrant, dependable color mixing without the premium price tag.Liquitex Basics Fluid Acrylics: The flowing, everyday tier. Basics Fluid brings the highly accessible price point of the standard Basics line into a flowing, self-leveling consistency. It requires no water or medium to thin, flowing straight from the bottle for pouring techniques, splattering, and detailed brushwork. It offers students and budget-conscious artists a reliable, highly pigmented liquid acrylic that dries to a durable, permanent finish.
Options & Tiers:

M. Graham Acrylics
While standard acrylic emulsion is roughly 50% water and 50% acrylic polymer, M. Graham uses a unique resin that allows for up to 60% solids.The Result: Because there is less water to evaporate, the paint shrinks less when it dries. The texture you see wet is closer to the texture you get dry.The Side Effect: This high-solid formulation naturally extends the open time. M. Graham acrylics stay wet and blendable for about 45–60 minutes—significantly longer than standard acrylics (20 mins) but dry faster than Golden OPEN.The No Filler RuleThe Ingredients: M. Graham is obsessive about purity. They do not use fillers, bulking agents, or matting agents.The Texture: This makes the paint feel incredibly creamy rather than stiff or plastic. It brushes out with a sensuous, oil-like feel that is distinct from the "snap" of Liquitex.The Finish: Because they don't add matting powder, the paint dries to a natural gloss. If you want it matte, you must add a medium or varnish.The Color EconomyM. Graham focuses on the basics.The Range: They have a smaller color chart than Golden (roughly 50 colors vs 100+), focusing on traditional pigments used by serious painters.The Strength: The pigment load is massive. Because the "High Solid" resin is so clear and strong, they can pack it with pigment without the binder breaking. A tube of M. Graham often tints further than almost any other brand.Working PropertiesViscosityThe Feel: Luscious paste. It is a heavy body paint, but it feels softer and more wet than stiff brands like Old Holland. It is designed to flow off the brush, not fight it.DryingThe Magic: Extended. It gives you that extra 30 minutes to soften an edge or blend a sky that you desperately miss with other brands. It is the perfect middle ground for artists who hate how fast acrylic dries but find Golden OPEN too slow.The ArtHero VerdictThe plein air painter:This is your best friend.Why: The slightly slower drying time buys you critical minutes when painting outdoors in the wind or sun, without forcing you to wait days for a layer to dry.The matte lover:Buy a medium.Why: This paint is glossy. If you hate shine, you will need to mix it with a Matte Medium or varnish it later.

Matisse Acrylics
Manufactured in Australia by Derivan since 1964, Matisse is a world-class acrylic system known for its exceptional pigment loading and its uniquely Australian color palette—featuring hues like Australian Ghost Gum and Red Violet. Matisse is designed as a fully compatible ecosystem where every color is available in multiple viscosities, allowing artists to choose the exact "feel" they need without sacrificing color intensity. Whether you are building 3D textures, painting detailed portraits, or exploring liquid pouring techniques, Matisse’s professional-grade, lightfast formulas offer a luscious, highly pigmented experience that has made them a favorite of contemporary artists globally.Choose a specific product line below to view user reviews and details about open time, pigment load, relative cost, lightfastness and viscosity.Specific Product LinesMatisse Structure Formula: The professional, heavy-body tier. This is a rich, high-viscosity paint with a thick, buttery consistency. It is specifically engineered for impasto techniques, where brushstrokes and palette knife marks need to remain crisp and distinct. Despite its thickness, it remains flexible and highly pigmented, making it the ideal choice for bold, dimensional textures and traditional canvas painting.Matisse Flow Formula: The professional, medium-viscosity tier. Flow Formula has the exact same high pigment load and lightfastness as the Structure range but in a smooth, cream-like consistency. It glides effortlessly from the brush, making it perfect for fine detail work, flat areas of color, and mural painting. It is highly versatile and can be thinned further for watercolor-style washes or used in airbrushing with minimal dilution.Matisse Fluid Formula: The professional, high-flow tier. This is Matisse’s most liquid-like paint, featuring an ink-like viscosity while maintaining incredible color intensity. Because it is so thin yet highly concentrated, it is the perfect choice for acrylic pouring, tinting, glazing, and airbrushing. It spreads easily for broad washes but can also be used for highly controlled, detailed linework and calligraphy.
Options & Tiers:

Milo Acrylics
Milo Art Supplies is an American-owned company based in the USA. They specialize in affordable, high-volume paints designed primarily for the Student and Hobbyist markets. Their products are positioned as a budget-friendly alternative to high-end brands like Golden or Liquitex, emphasizing safety (Non-Toxic) and American manufacturing.1. Product LinesMilo Student Fluid AcrylicsFormat: Large 8 oz or 16 oz squeeze bottles.Consistency: Fluid / High Flow. * This is their most popular line. The paint is thin enough to pour but thick enough to hold some level of opacity.Use: Excellent for "Acrylic Pouring" (dirty pours), large-scale classroom projects, and covering big areas of canvas or wood quickly.Safety: AP Certified Non-Toxic and allergen-free (no latex, dairy, soy, or gluten).Milo Heavy Body AcrylicsFormat: 8 oz wide-mouth jars.Consistency: High Viscosity. * Unlike their fluid line, this version is thick and buttery. It is designed to hold texture and recording visible brush or palette knife strokes (Impasto).Performance: Higher pigment load than the fluid line. It is intended for students transitioning into more "painterly" techniques where 3D texture is required.Milo Neon / Fluorescent AcrylicsThe Specialty: A set of 6 high-intensity colors (Pink, Orange, Yellow, Green, Blue, Purple).Feature: Blacklight Reactive. These colors glow under UV light.Lightfastness: Rated around a 3 (Fair). Like most neon pigments, they are prone to fading if exposed to direct sunlight for long periods. They are intended for indoor crafts and posters.2. Key CharacteristicsMade in the USA:A major selling point for the brand. They highlight local production as a sign of quality control and safety standards.Versatility:Designed as a "Multi-Surface" paint. While primarily used on canvas and paper, it is formulated to stick well to Wood, Pumpkins, Rocks, and Ceramics.Finish: * Most colors dry to a Semi-Gloss finish, providing a slight sheen without the extreme gloss of a professional heavy body or the chalky matte of a cheap tempera.Washability:Labeled as "Washable" from skin and some surfaces, but once dry on fabric, it is permanent.3. Comparison: Milo vs. The CompetitionMilo vs. Liquitex Basics: Liquitex Basics generally has a higher pigment-to-binder ratio and more "open stock" availability. Milo is a better value for Bulk Volume (8 oz bottles vs. the standard 4 oz tubes of Basics).Milo vs. Apple Barrel (Craft Paint): Milo is a significant step up. Apple Barrel is very watery and matte; Milo is a true "Student Acrylic" with better coverage and a more professional semi-gloss finish.Professional Use: While Milo is great for practice, it lacks the archival lightfastness and heavy pigment concentration required for professional gallery work.4. Summary ChecklistStudent Fluid Acrylics: Squeeze Bottles / Fluid / Best for Acrylic Pouring & Classrooms.Heavy Body Acrylics: Jars / Thick & Buttery / Holds Texture / Best for Palette Knife.Neon Acrylics: Fluorescent / Glows under Blacklight / Best for Posters & Crafts.Main Benefit: High Volume (8 oz+) / Made in USA / Non-Toxic.Main Downside: Not archival for long-term professional sales; limited color range compared to pro brands.

Nova Color Artists Acrylic
If there is a best-kept secret in the American muralist and large-scale painting community, it is absolutely Nova Color. Founded in California in 1965, Nova Color was famously known as a direct-to-consumer brand, completely bypassing retail stores to offer professional bulk paint to working muralists. However, in a massive shift for the industry, Nova Color is now available through major retailers like Blick, making this legendary Californian paint easily accessible to standard studio artists.This retail shift means you no longer have to buy a gallon-sized bucket to experience what the professionals have been using for decades.The Binder: 100% Acrylic ResinNova Color does not cut corners with cheap fillers to achieve its price point. It utilizes a 100% acrylic resin binder, making it comparable to the top-tier name brands on the market. This pure binder ensures the paint film dries highly flexible, water-resistant, and incredibly durable—which is exactly why it has been the trusted choice for outdoor muralists facing harsh weather conditions for decades.The Consistency: The Perfect Soft BodyUnlike traditional heavy body acrylics that require stiff tubes, Nova Color comes exclusively in jars and buckets because of its consistency. It is a true soft body or "creamy" acrylic. It is far more fluid than heavy body paint, allowing it to spread beautifully and effortlessly over large surface areas without dragging. However, it is not as watery as high-flow or airbrush paints, meaning it still retains excellent control on the brush.The Muralist's WorkhorseBecause of its unique combination of elite durability, soft-body flow, and budget-friendly bulk sizing, Nova Color allows artists to work on massive canvases or outdoor walls without the constant anxiety of how much money they are squeezing onto their palette. It is unpretentious, highly reliable, and built for volume.

Old Holland New Masters Classic Acrylic
Established in 1664, this is the oldest paint manufacturer in the world. For centuries, they refused to touch acrylics, viewing them as inferior plastic.When they finally released the New Masters line, the goal was audacious: to create an acrylic that looked, felt, and behaved exactly like their legendary oil paints. The result is a product that bridges the gap between the 17th and 21st centuries. These paints use the exact same pigments as their oil line (meaning you get real historic earths and heavy metals), suspended in a proprietary 100% acrylic binder that eliminates the "plastic" feel almost entirely.The Zero Shift PromiseThe Problem: Most acrylics darken significantly as they dry (the "color shift") because the white emulsion turns clear.The Old Holland Solution: They use a specialized binder that is clearer when wet than standard emulsions.The Result: The color on the palette is virtually identical to the dry color on the canvas. For realistic painters who need to match skin tones perfectly, this precision justifies the massive price tag.Working PropertiesTextureThe Feel: Buttery paste. It is a heavy body paint, but it lacks the "snap" or rubbery bounce of American acrylics. It feels denser and oilier. It holds a brushstroke with the same "short" character as lead white oil paint.FinishThe Look: Satin-gloss. Because they use high concentrations of resin to bind the massive pigment load, the dried surface has a rich, deep gloss that mimics a varnished oil painting. It does not look like dry plastic.The ArtHero VerdictThe "classical realist":This is your Holy Grail.Why: If you trained in oils but developed an allergy to turpentine, this is the acrylic that won't make you cry. The handling is eerily similar to oil.The budget student:Do not touch.Why: A single tube of Cadmium Red in this line can cost more than a week's worth of groceries. It is strictly for professional, gallery-destined work.

Pebeo Acrylics
Founded in 1919 near Marseille, France, Pébéo has established itself as a global leader in art material innovation, blending traditional French craftsmanship with modern chemical research. Known for their "Mixed Media" philosophy, Pébéo acrylics are engineered to be exceptionally versatile and highly adherent to a wide range of surfaces. Whether you are a professional seeking a pioneering, eco-conscious formulation or a student requiring a high-viscosity workhorse for textured impasto, Pébéo offers a reliable, intermixable system designed to meet the demands of contemporary art practices.Choose a specific product line below to view user reviews and details about open time, pigment load, relative cost, lightfastness and viscosity.Specific Product LinesPébéo Origin Acrylics: The professional-grade, eco-designed tier. Origin represents a breakthrough in sustainable paint technology, utilizing a 100% recycled binder and bio-sourced ingredients to significantly reduce environmental impact without sacrificing professional performance. It features a thick, "nervous" consistency that holds crisp brushstrokes and palette knife marks, drying to a sophisticated matte finish. With high pigment concentrations, it is designed for artists who demand both archival quality and environmental responsibility.Pébéo Studio Acrylics: The premium student and high-volume tier. This range is famous for its "High Viscosity" (HV) formulation, which offers a thick, buttery consistency specifically designed for dimensional work and impasto. It dries to a modern satin finish and is particularly noted for its inclusion of "Dyna" iridescent colors—pigments that shift hue based on the angle of light. It is an exceptionally durable and flexible paint, making it a favorite for mixed media, large-scale canvas work, and educational environments.
Options & Tiers:

Schmincke Acrylics
Based in Germany, Schmincke has defined European excellence in color-making since 1881. In 2025, Schmincke completely reimagined their PRIMAcryl Professional line, introducing a groundbreaking, microplastic-free binder made primarily from recycled raw materials. This innovative clear resin ensures that colors dry with virtually zero color shift, maintaining the exact brilliance and intensity seen when wet. Renowned for its buttery texture and elite lightfastness, PRIMAcryl is the ultimate "clean" professional acrylic, offering a massive range of single-pigment colors and industry-leading titanium whites that provide unsurpassed opacity and coverage.Choose a specific product line below to view user reviews and details about open time, pigment load, relative cost, lightfastness and viscosity.Specific Product LinesSchmincke PRIMAcryl Tubes (Heavy Body): The flagship professional, high-viscosity tier. This heavy-body paint features a remarkably creamy, "nervous" consistency that holds peaks and structural textures from brushes and palette knives without being sticky. Formulated with the highest possible pigment concentration, it dries to an elastic, shape-stable, and waterproof finish. With a palette of 90 professional shades—including 60 single-pigment formulas—it is designed for artists who demand oil-like handling and uncompromising archival permanence.Schmincke PRIMAcryl Professional Fluid: The premium, high-flow professional tier. PRIMAcryl Fluid delivers the same elite pigment intensity and microplastic-free sustainability as the tube colors, but in a smooth, self-leveling liquid consistency. Utilizing a lower-viscosity version of the 2025 clear binder, it is ideal for fine detail work, glazing, and contemporary pouring techniques. It glides effortlessly from the brush without the need for additional thinning, ensuring that chroma remains powerful even in thin, liquid applications.
Options & Tiers:

Sennelier Acrylics
Established in Paris in 1887, Sennelier is inextricably linked to the history of modern art, having originally formulated colors for masters like Cézanne, Gauguin, and Picasso. Today, Sennelier continues to merge this artistic heritage with contemporary chemical innovation to produce acrylics of extraordinary luminosity. Their signature approach emphasizes a "creamy and rich" texture that mimics the handling of their legendary oil paints. Whether you are a professional seeking the absolute pinnacle of pigment concentration or a contemporary artist looking for a high-performance, mobile painting system, Sennelier delivers a distinctly French, highly refined experience.Choose a specific product line below to view user reviews and details about open time, pigment load, relative cost, lightfastness and viscosity.Specific Product LinesSennelier Extra-Fine Artist Acrylics: The professional, master-quality tier. This line is designed to provide the same consistency and rendering capability as Sennelier’s extra-fine oils. With a palette of 120 shades, it features an exceptionally high pigment content (primarily single pigments) to ensure maximum color purity and archival stability. The texture is a rich, heavy-body paste that retains crisp brush and knife marks, drying to a permanent, non-yellowing film with a uniform satin finish. It is the ultimate choice for artists who demand historical pedigree and uncompromising pigment power.Sennelier Abstract Acrylics: The innovative, high-performance studio tier. Abstract revolutionized the market with its high-pigment, "creamy-to-thick" consistency packaged in a unique, flexible air-tight pouch. This design allows artists to use every last drop of paint and even apply it directly to the surface using specialized nozzle tips. While more accessible in price, it maintains a professional pigment load (including 34 single-pigment colors) and excellent covering power. It is highly popular with muralists, street artists, and students who need a heavy-body, mobile, and waste-free professional system.
Options & Tiers:

Tri-Art Acrylics
Tri-Art Manufacturing (Kingston, Ontario) is a Canadian company founded by artists who wanted high-performance paint without the "filler" found in commercial brands. They are famous for two things: Texture (their mediums are legendary) and ecological innovation (they invented "Sludge" paint to recycle waste). They are arguably the best "bang-for-your-buck" brand in North America because their "student" line (Rheotech) outperforms many professional brands.1. High Viscosity (Professional heavy body)The flagship line. Thick, buttery, and incredibly strong.Texture: Extra heavy body. It is stiffer than Golden Heavy Body. It holds huge peaks and knife marks without sagging.Pigment: 100% Acrylic emulsion with maximum pigment load.Finish: Gloss. (Most acrylics dry satin; Tri-Art formulates theirs to dry glossy to retain the "wet look" of the pigment).Best For: Impasto, palette knife painting, and texture building.Packaging: Famous for using jars and squeeze bottles even for thick paint, allowing you to use every drop without the waste of metal tubes.2. Liquid Acrylics (Professional Fluid)The "Self-Leveling" powerhouse.Texture: Creamy fluid (like heavy cream).Behavior: It levels itself out. If you brush it on, the brushstrokes disappear as it dries, leaving a perfectly flat, glossy field of color.Pigment Load: Extremely high. You can thin this down with water to make watercolor washes, and the color remains vibrant.Interference Colors:Tri-Art is famous for their interference and iridescent liquids. They use high-grade mica that "flips" color (e.g., looks clear, but flashes blue when the light hits it). These are widely considered some of the best interference paints on the market.Best For: Glazing, pouring, fine detail, and watercolor effects.3. Rheotech (The "student" line)The secret weapon of art teachers and budget-conscious pros.The Concept: Most "student" paints (like Liquitex Basics) use fillers that make the paint feel plastic and look chalky. Rheotech does not.Texture: It mimics the high viscosity professional line. It has a true "heavy body" feel.Pigment: It uses the same pigments as the professional line, just in a lower concentration. It does not use cheap "hue" substitutes for earth tones.Coverage: Opaque. It covers canvas better than almost any other student grade.Best For: Students, underpainting, and large-scale abstracts where you need gallons of paint on a budget.4. Specialty LinesLiquid Glass (The Resin Replacement):What it is: A pouring medium that dries rock-hard and high-gloss.The Feature: It mimics epoxy resin. You can pour it over a painting to get that thick, glass-like finish, but it is non-toxic, doesn't smell, and doesn't require mixing a hardener.Best For: Pour painting and finishing coats.Sludge (The "Green" Paint):What it is: Tri-Art recycles the solids from their factory wash-water filtration system. Instead of throwing this pigment waste in a landfill, they mix it into a usable paint called "Sludge."Color: Variable Grey. Every batch is different depending on what colors they were making that week.Use: It is the cheapest professional-quality paint you can buy. Artists use it as a neutral ground, a toner, or a base coat.UVFX (Blacklight):Feature: Phosphorescent and fluorescent paints designed for stage design and club murals. They are transparent in daylight but glow intensely under UV light.5. Summary ChecklistHigh Viscosity: Stiffest body / High gloss / Best for impasto.Liquid Acrylics: Self-leveling / High pigment load/ Best for glazing & pours.Rheotech: Student price / Pro texture / Best value.Liquid Glass: Pouring medium / Resin alternative / High gloss.Sludge: 100% recycled / Neutral grey / Eco-friendly / Cheapest option.

Utrecht Acrylics
Founded in Brooklyn, New York in 1949, Utrecht has spent decades as a cornerstone of the American art community, providing high-performance materials directly to artists and art institutions. Known for their "no-nonsense" approach to manufacturing, Utrecht focuses on high pigment concentrations and consistent handling without unnecessary additives. Their acrylics are engineered to be exceptionally flexible and durable, designed to withstand the rigors of both the classroom and the professional gallery. Whether you require a pure, professional-grade heavy body paint or an economical, high-volume studio workhorse, Utrecht’s Brooklyn-milled formulas deliver professional-grade reliability and excellent archival permanence.Choose a specific product line below to view user reviews and details about open time, pigment load, relative cost, lightfastness and viscosity.Specific Product LinesUtrecht Artists’ Acrylic Colors: The professional, master-quality tier. This line is characterized by its high pigment load and a thick, buttery consistency that holds crisp peaks and brush marks. Formulated with a 100% acrylic polymer emulsion, it contains no fillers or extenders, ensuring maximum tinting strength and brilliant color clarity. With a focus on single-pigment colors and elite lightfastness, it is the premier choice for professionals demanding archival stability and the highest level of performance.Utrecht Studio Series Acrylics: The premium student and high-volume tier. Designed to provide a professional feel at a more accessible price point, the Studio Series offers a medium-to-heavy body viscosity that is perfect for learning color theory and underpainting. By utilizing safe, high-quality synthetic alternatives for expensive pigments (hues), Utrecht maintains a vibrant, intermixable palette that behaves much like the Artists' line. It is a favored workhorse for educators, muralists, and artists working on a large scale who require dependable color coverage.
Options & Tiers:

Winsor & Newton Acrylics
Founded in London in 1832, Winsor & Newton has spent nearly two centuries at the intersection of chemistry and art. As the company that held the first Royal Warrant, they have a long-standing reputation for scientific precision and uncompromising quality control. Their acrylic ranges are engineered to provide the most stable, lightfast, and vibrant results possible, utilizing advanced resin technology to minimize color shift. Whether you are a professional artist seeking the highest possible pigment concentration or a student looking for a reliable, high-volume paint with excellent brushability, Winsor & Newton offers a meticulously balanced system for every level of expertise.Choose a specific product line below to view user reviews and details about open time, pigment load, relative cost, lightfastness and viscosity.Specific Product LinesWinsor & Newton Professional Acrylics: The flagship, master-quality tier. This line is celebrated for its revolutionary clear binder, which ensures there is virtually no color shift from wet to dry—what you see on your palette is exactly what remains on the canvas. It features a high concentration of premium pigments, offering unsurpassed brilliance and tinting strength. With a smooth, thick, and buttery consistency, it is designed for artists who demand the highest level of archival permanence and a luxurious handling experience.Winsor & Newton Galeria Acrylics: The high-quality student and studio tier. Galeria is designed to provide professional-standard results at an accessible price point. It features a free-flowing, versatile consistency that is easy to use and thin, making it ideal for a wide variety of techniques from bold impasto to delicate washes. While it utilizes more affordable pigment alternatives, it maintains a high pigment load and excellent lightfastness, making it a favorite for educators, muralists, and artists working on a large scale.
Options & Tiers: